Splunk Setup Tutorial Using Twitter Data

New to Splunk? Looking to get data in there quickly so that you can learn what the software can do?
In this blog, I'll walk through a fun tutorial that uses social media to get you up-and-running with Splunk. We'll be using App for Twitter Data, a free app available on Splunkbase that streams live sample tweets into Splunk.
Splunk is pretty powerful out-of-the-box and has a lot of great features to harness your machine data. Splunk apps extend the software's power, allowing you to do more with your data. For example, the App for Twitter Data provides free code for a modular input, enabling you to send tweets into Splunk.
Without further adieu, lets get started!
1. Create a Twitter account (if you don't already have one).
2. Download and install Splunk.
3. Download the App for Twitter Data from Splunkbase
4. Login into Splunk to install the app.
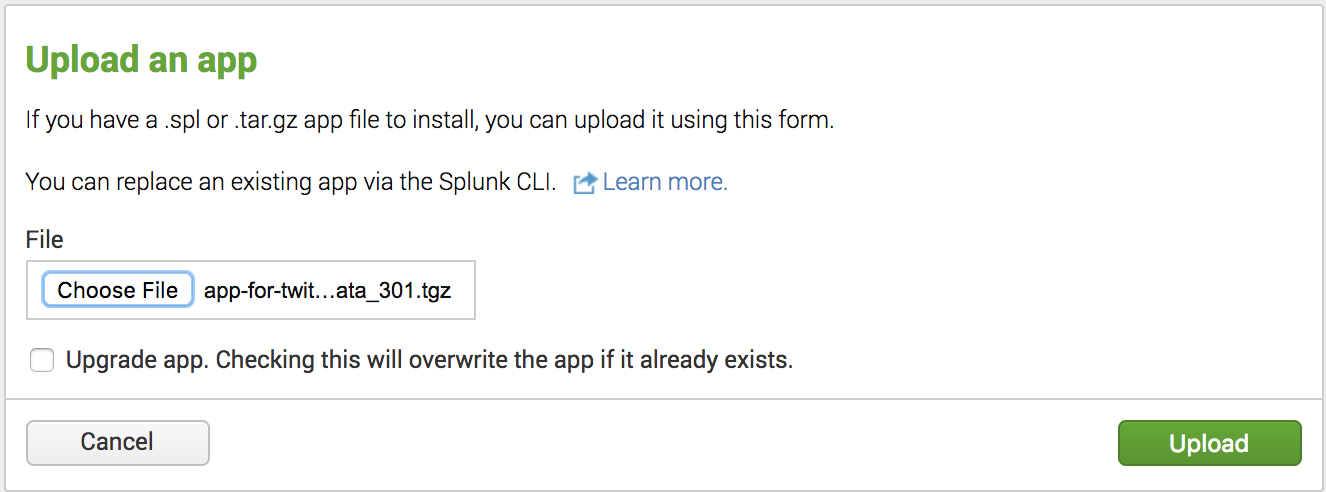
5. On the top left, click the gear icon next to "Apps," and then click "install app from file".
6. Select the app file you downloaded and click "upload."
7. Click “restart Splunk” and log back into Splunk.
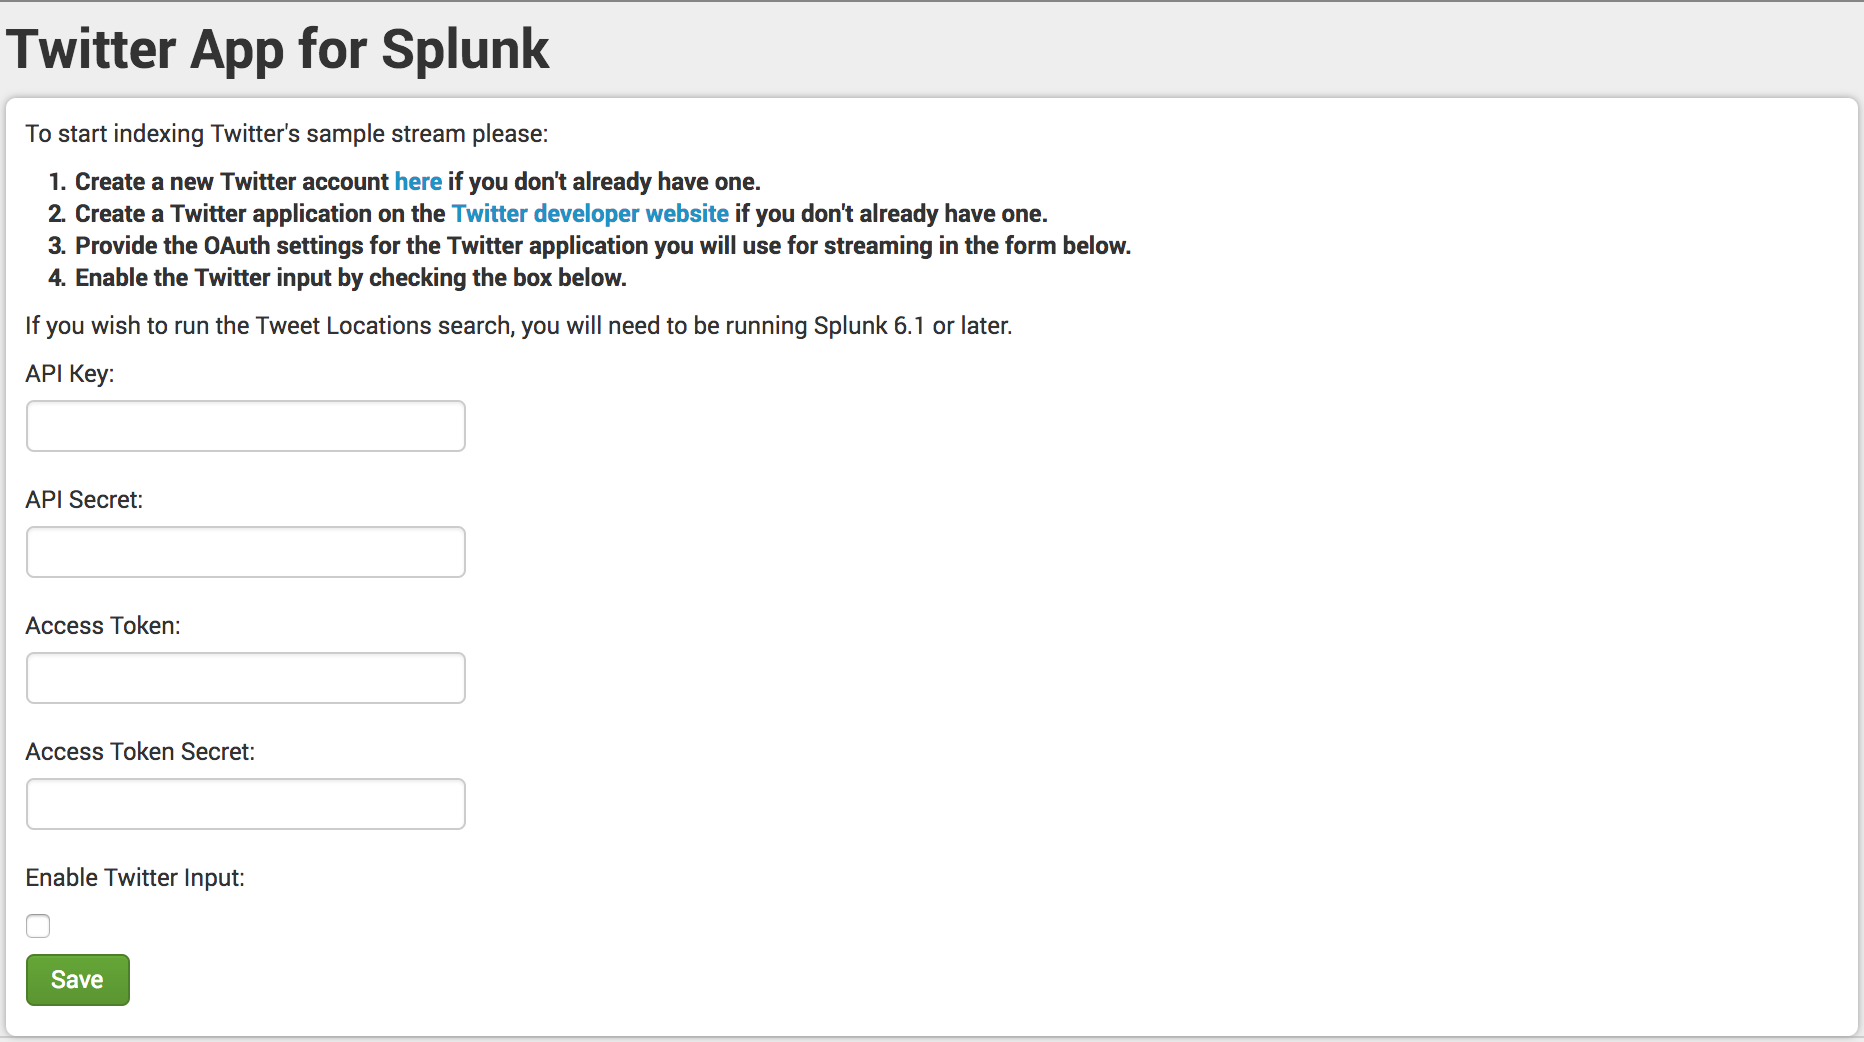
6. Once you're logged in, go to the app setup page. You should see the below screen with instructions for setting up the app. These instructions will guide you through setup with Twitter API.
7. Copy API keys and tokens into Splunk.
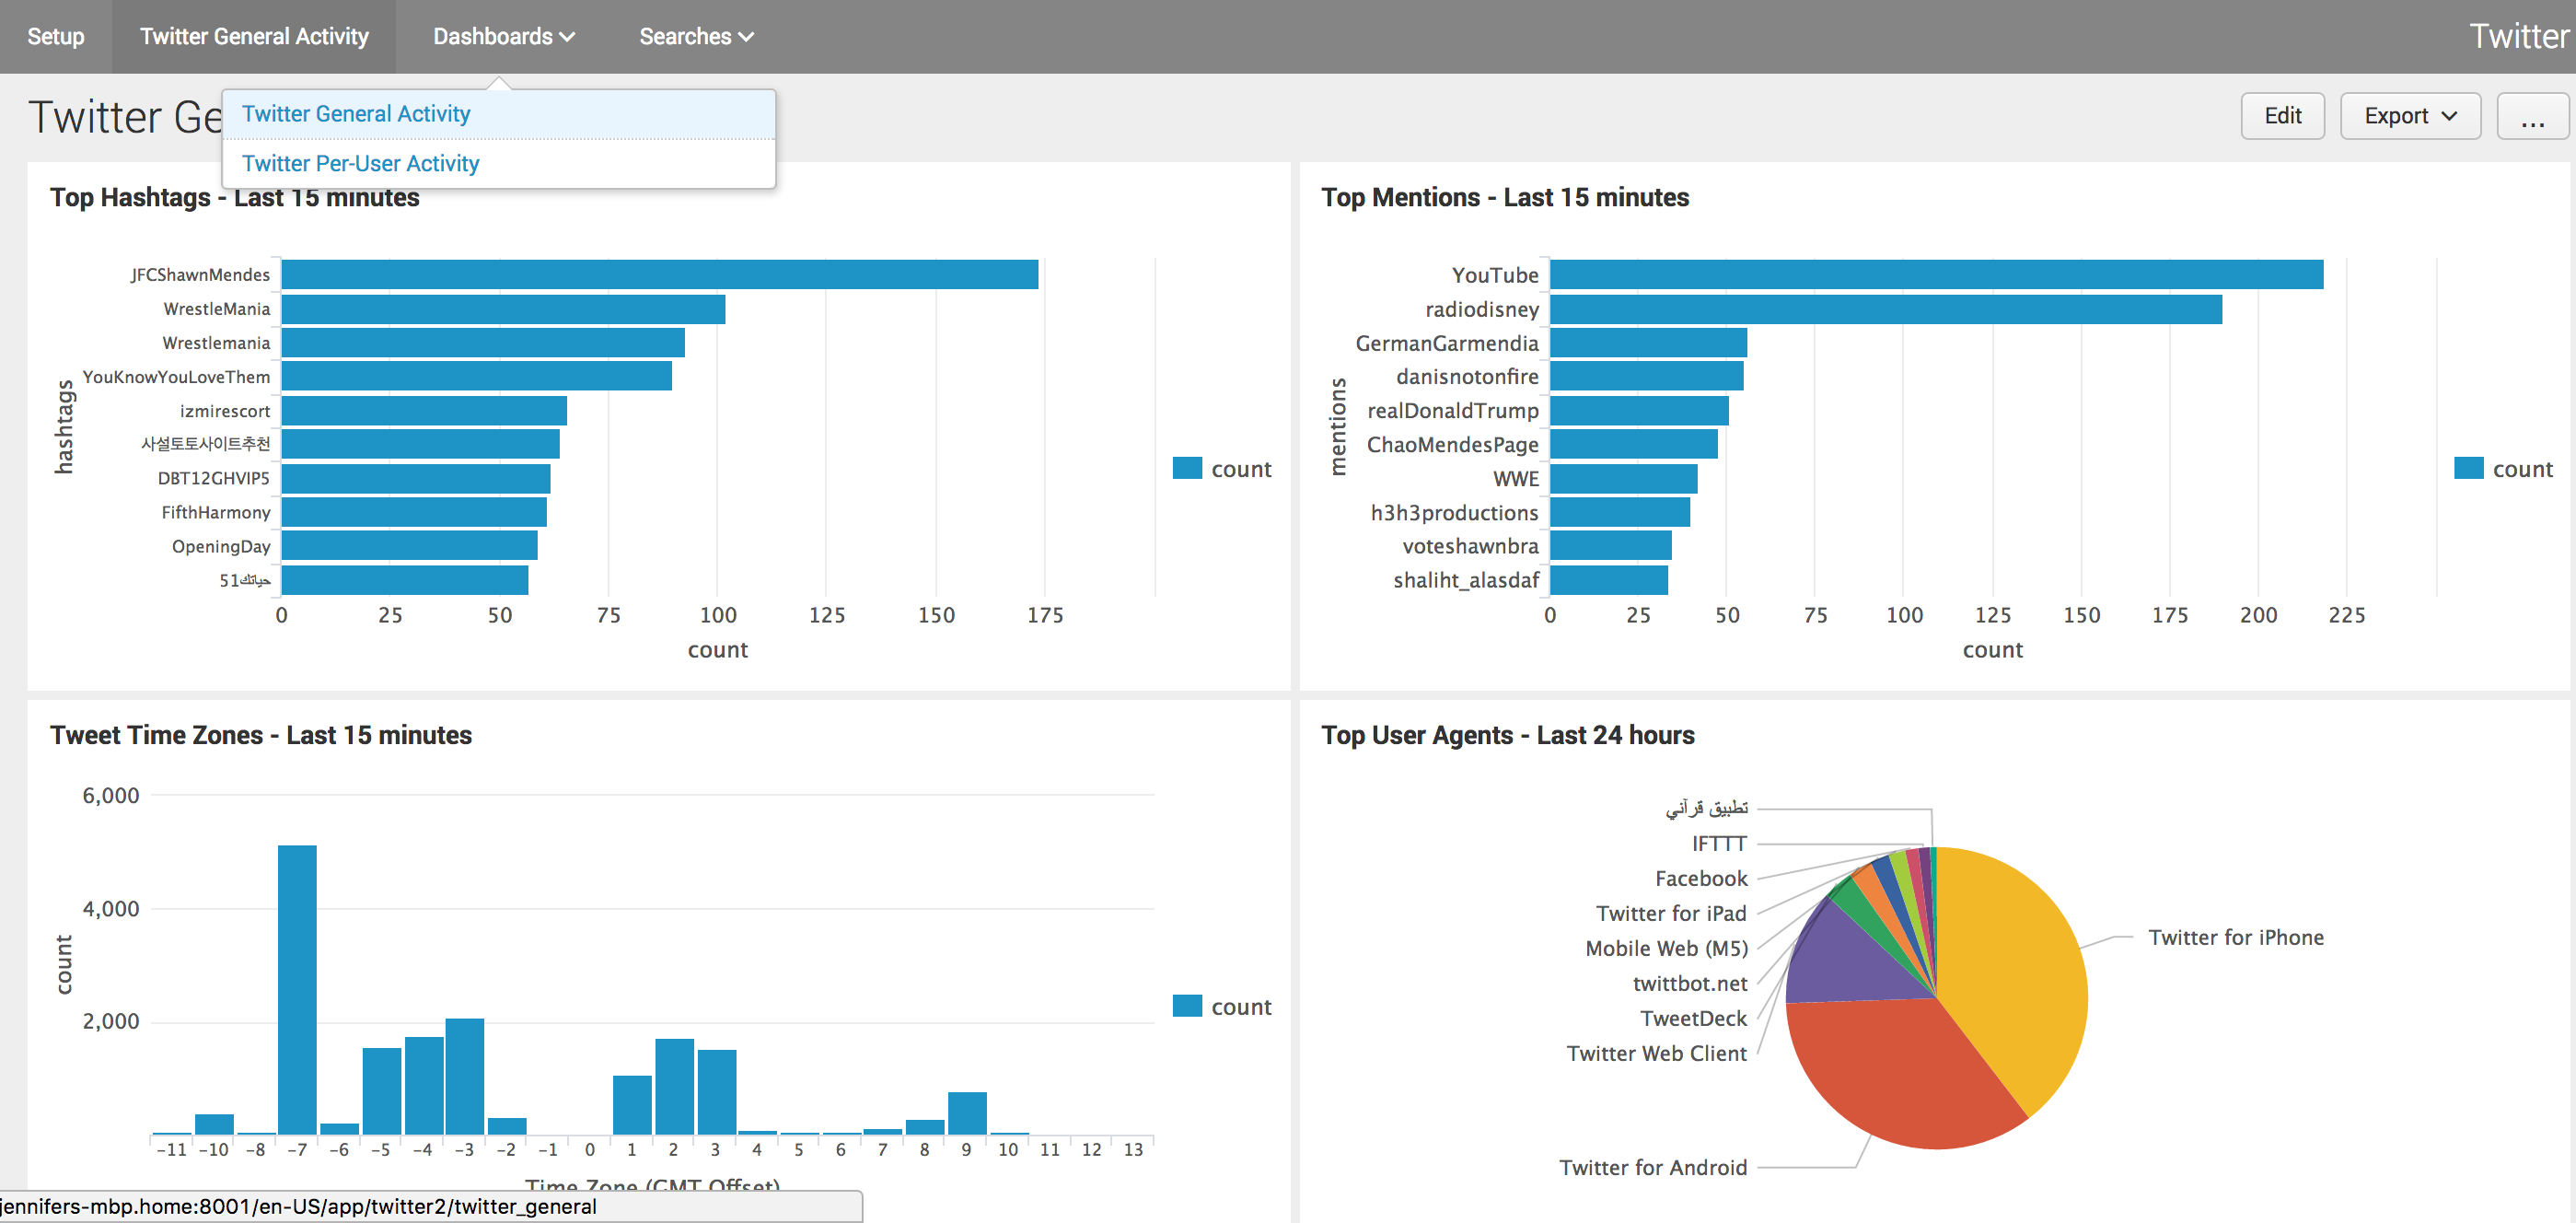
8. Enable the Twitter input by checking the box in setup instructions. If everything is setup correctly, you will see the Twitter General Activity dashboard being populated.
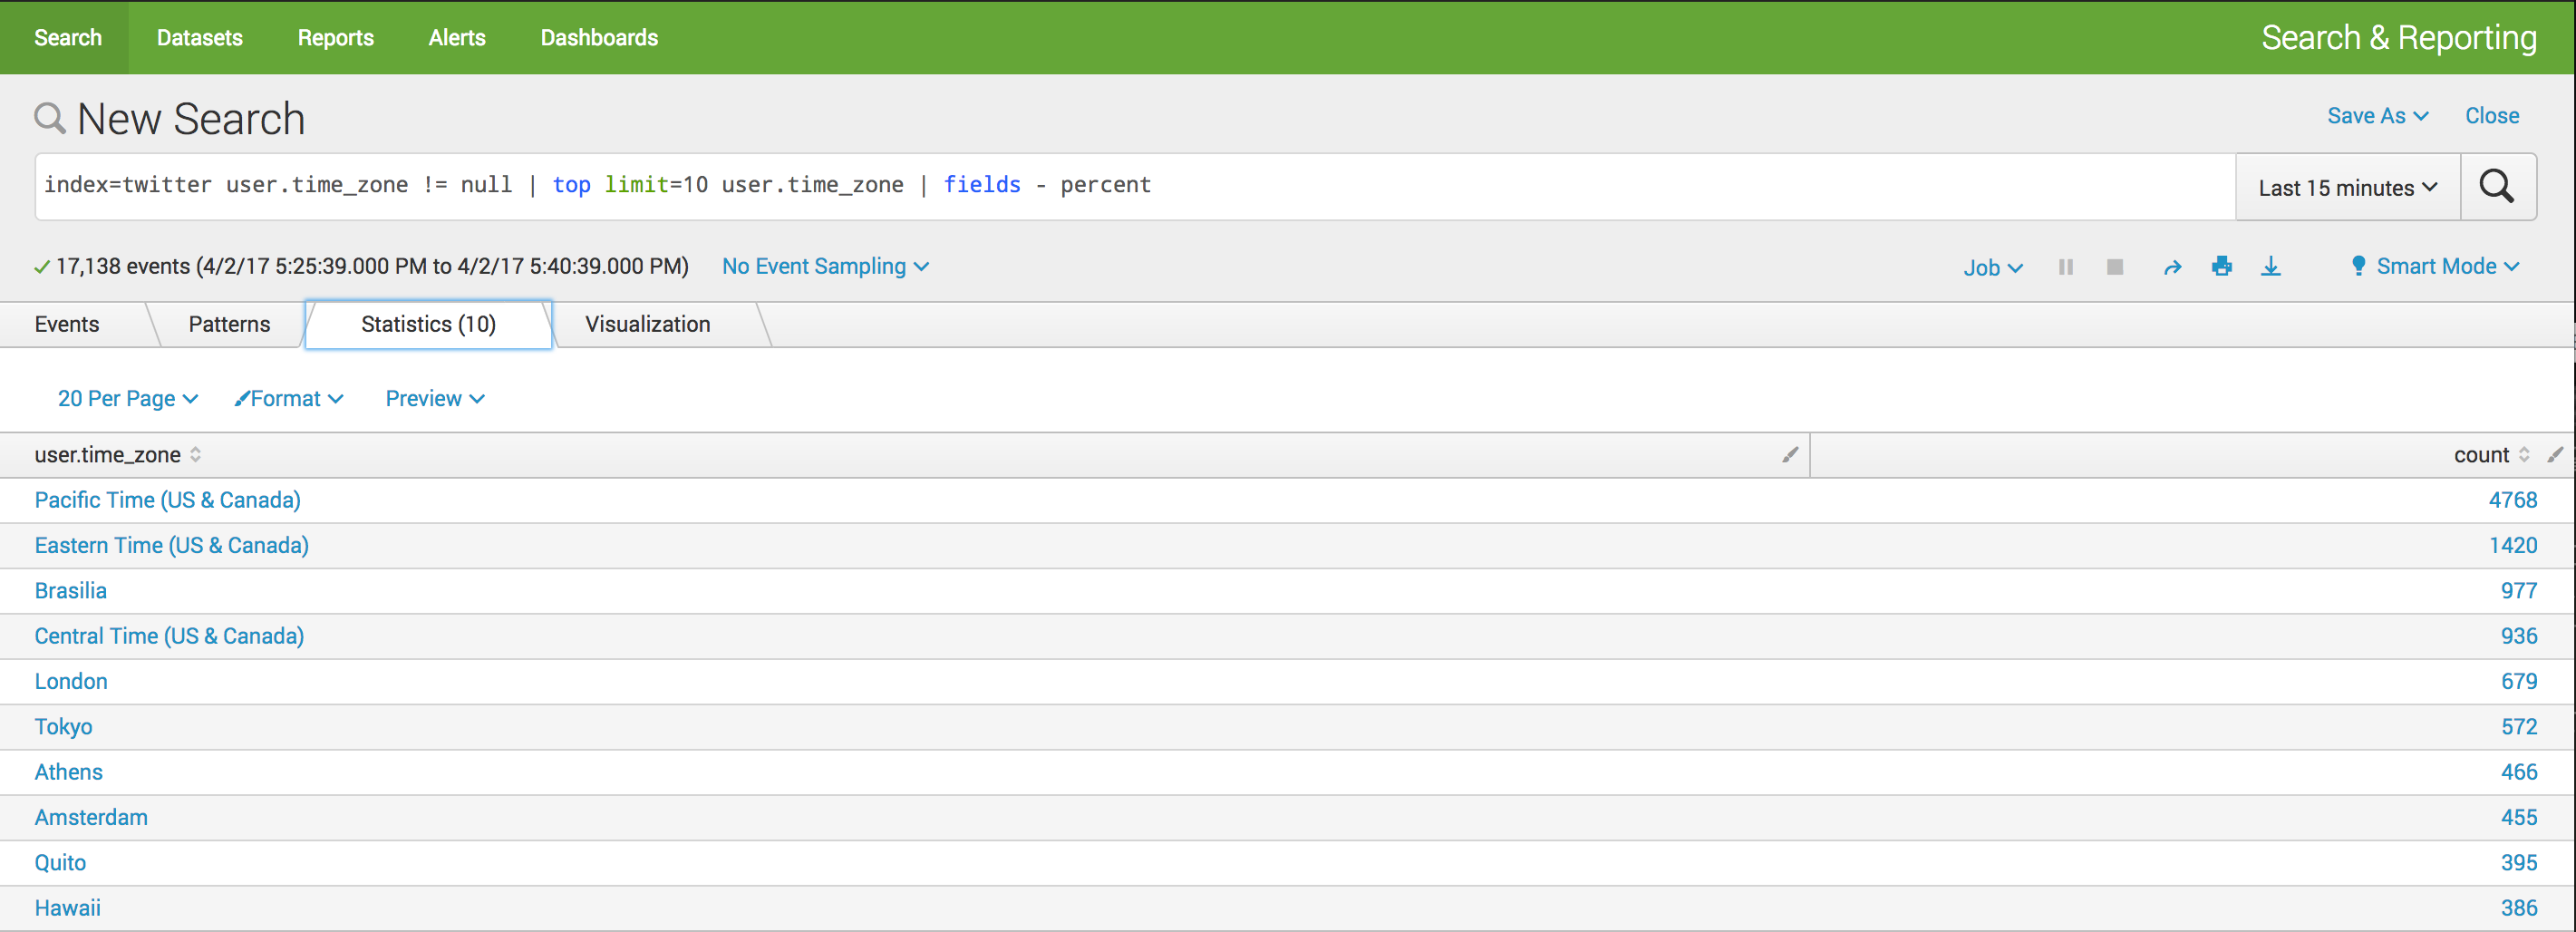
Start playing with the data by navigating to the search and reporting app and exploring all of the different fields that were automatically extracted by Splunk. What different searches and visualizations can you create? Below, for example, I'm looking at various time zones and determining which is streaming the most tweets in the last 15 minutes.
There you have it! You're all setup and ready to start playing around with live Twitter data in Splunk.
Happy Splunking!
- Log in to post comments


